ArmA3Sync is a powerful third-party launcher for ArmA 3 intended for managing mods. It simplifies downloading mods from many different repositories and can be used to manage custom mod collections.
Installation
Download and install ArmA3Sync from:
https://arma.zsu.gg/arma3sync-installer-1-7-107.exe
Warning!
Ensure that you install ZSU's version of ArmA3Sync, this helps us troubleshoot any issues you might face.
Initial Configuration
ArmA 3 Directory
Once installed, open ArmA3Sync. If prompted to find your ArmA 3 directory, point it to your arma3_x64.exe file. Failure to do so may break your installation and prevent you from joining the server.
In the ArmA3Sync program, navigate to the Addon Options tab and select the blue plus symbol on the far-right side. Navigate back to your ArmA 3 directory (the same directory as step one) unless you specifically store your mods elsewhere.
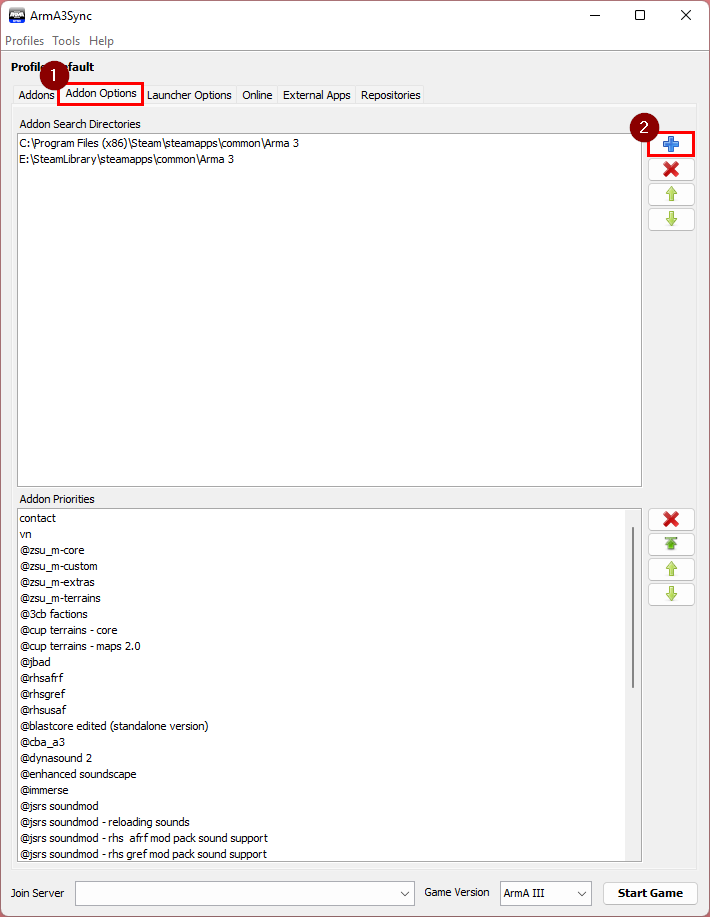
Note
You can typically find your ArmA 3 installation here: C:\Program Files (x86)\Steam\steamapps\common\Arma 3 Note that this may be different
depending on your installation directory.
Repository Management
Import Repository
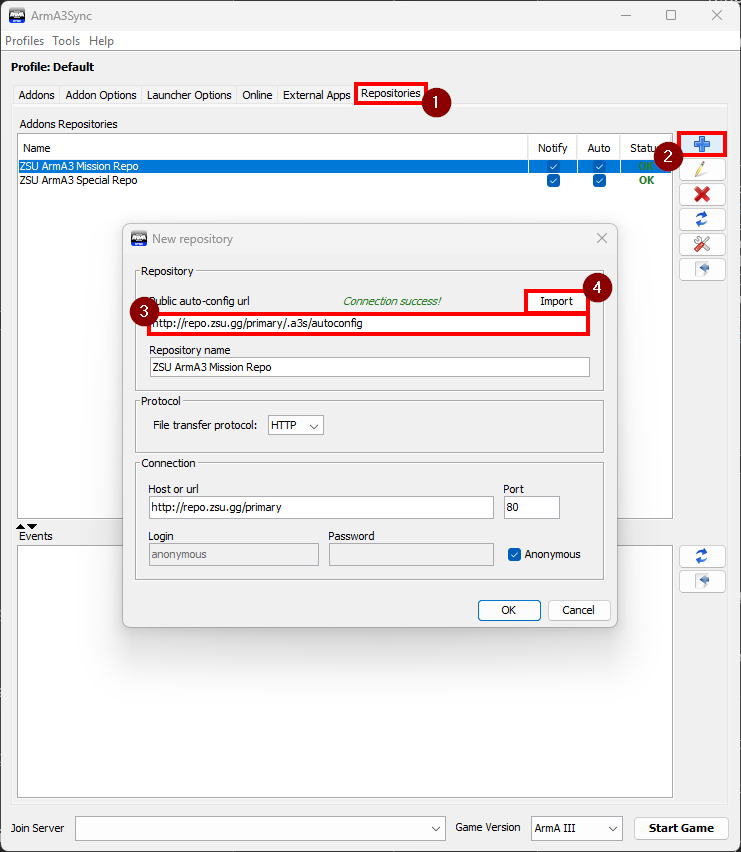
Navigate back to the Repositories tab of ArmA3Sync and click the blue plus symbol. In the Public auto-config url section, paste the following HTTP link:
http://repo.zsu.gg/primary/.a3s/autoconfig
Once entered, select the Import button. It will attempt to connect to the repository. On a successful connection, it will read Connection success!. If successful, select OK to save and exit this prompt.
Notifications
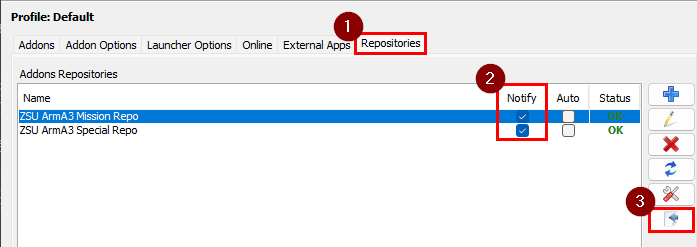
Back under the Repositories tab select the Notify checkbox for the ZSU ARMA3 Mission Repo then click the Connect to repository button (bottom-most button) to enter into the repository.
Download
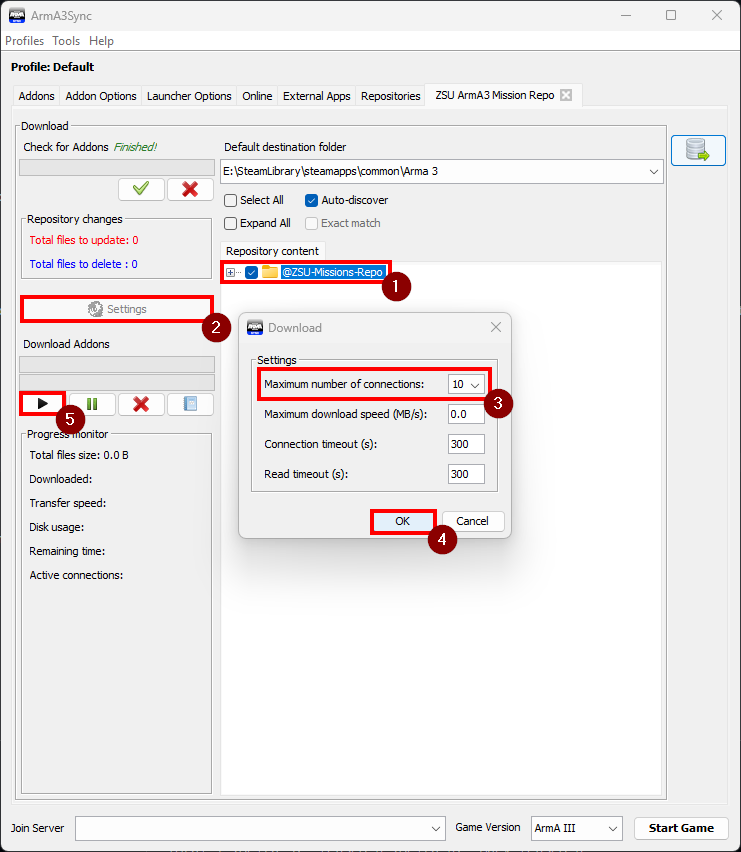
Once it has finished checking for addons, tick the @ZSU-Missions-Repo box, then open the Settings menu and set Max Connections to 10, then click the download button (black play button).
Import Modset
Once the repository download is finished in ArmA3Sync, jump back to the Addons tab and click the Modsets button (blue plus button). Tick the ZSU ArmA 3 Mission Repo repo and select OK.
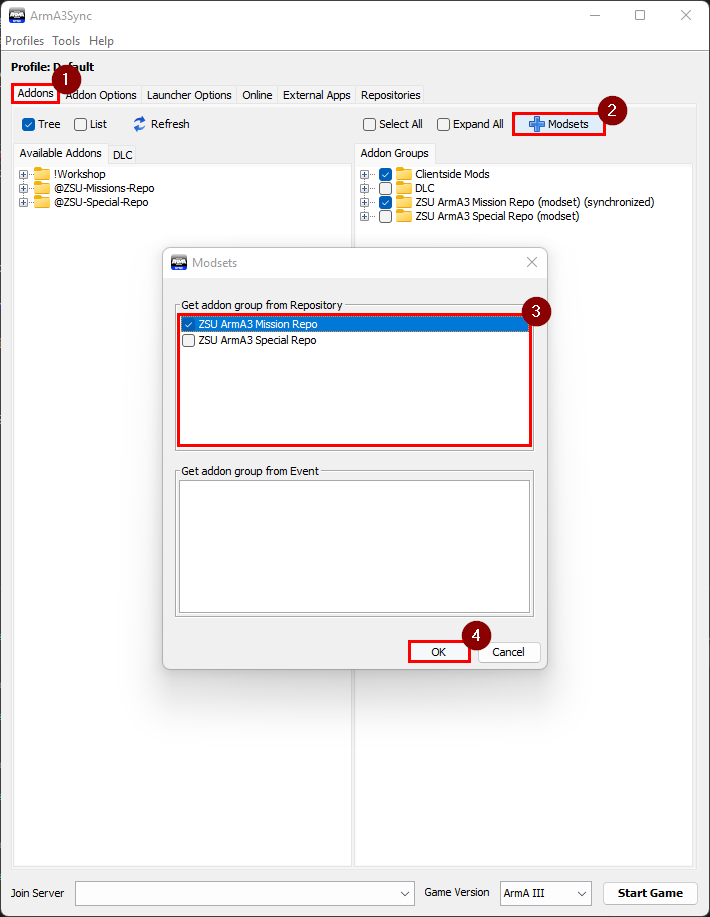
Shortly, a folder with all the mods synchronized with the repository will appear on the Addon Groups panel on the right.
Setup @Common Mods
Now that the mission repository has been downloaded, we have to setup our Workshop mods.
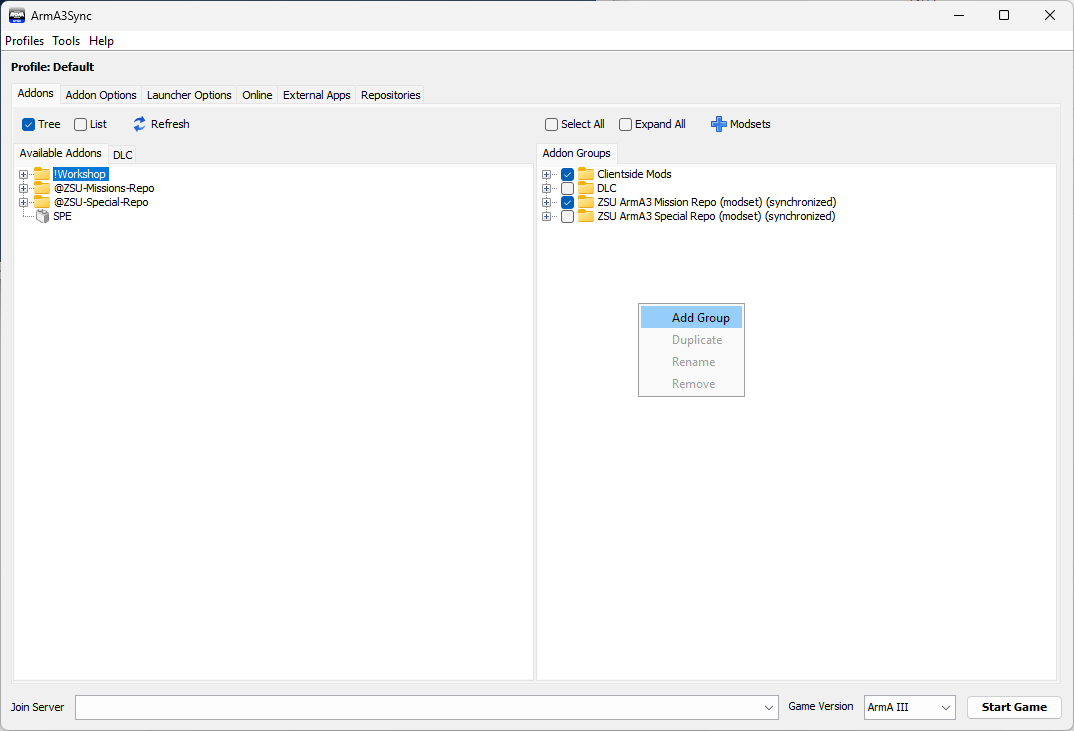
Right click in the blank area of Addon Groups and select Add Group.
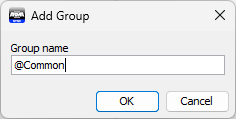
Name the group @Common.
Drag the following mods from the !Workshop folder under the Available Addons tab and place them in the newly created @Common folder.
- @3CB Factions
- @CUP Terrains - Core
- @RHSAFRF
- @RHSGREF
- @RHSUSAF
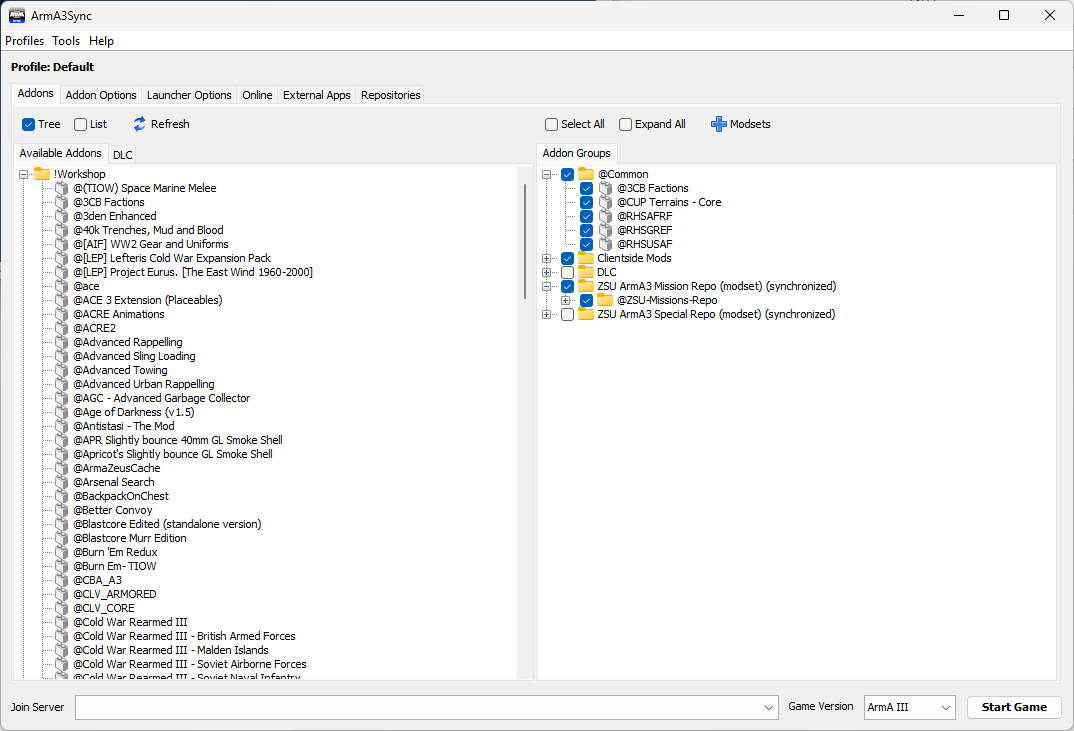
Your @Common folder should look like this:
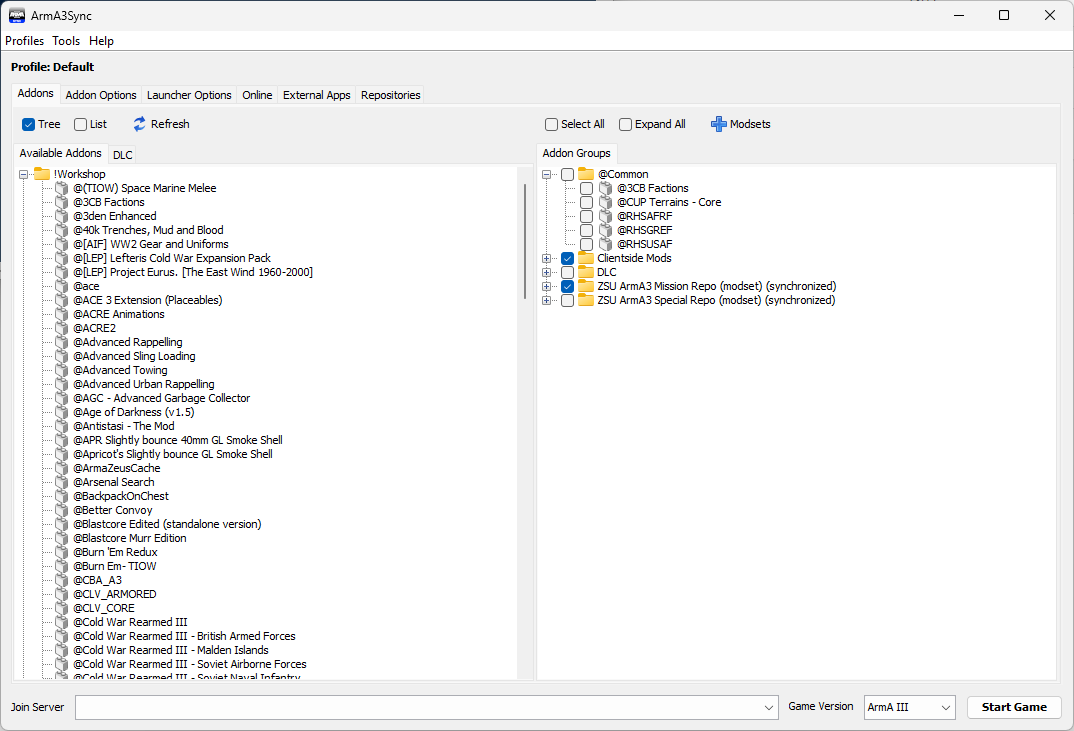
Now, tick to enable the mods select start game!
Alert!
When playing missions with ZSU, you must launch the game through
ArmA3Sync. Do not put any info in the Join Server area.
